I was in the scrapbooking department of our local discount store (don't judge me) when I spied some small self-adhesive stencils. Normally when I etch metal I draw on a design which is fine except that it generally lacks consistency and is hard to repeat - that is the free-form way I'm afraid. So I thought "hhmmm - if these little stencils can be re-used, they might be just the ticket" and plonked my two bucks on the counter and brought them home. This post is all about how I used them - an experiment really.


On goes the stencil - it was kinda stretchy but settled into place without too much wrangling.

Here I have coloured in all the negative space using a permanent texta. For some reason black works best. I gave it two coats, allowing the first to dry before the next application. This is the resist.

Taped onto polystyrene, ready to be floated in the acid.

In the acid bath. I was down to my last few mils of Ferric Chloride and it quickly became apparent that there was not enough liquid to float my metal. Since the plate was hard up against the bottom of the bath there was no etching action going on. sigh. I hauled it out, took it off the polystyrene and washed it off. Once dry, I used gaffer tape to protect the back and sides and put it face up in the bath.

And this is why I prefer to float the piece. When you do it face up all the little particles that are etching settle onto the face of the plate creating that speckling. It is not a big deal in this case but I would be pissy about in other circumstances!
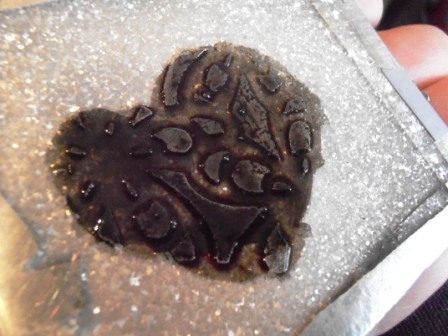
It is tricky to see what is what so I brushed on some patina ...

and gave it a quick sand to reveal the high areas.

I drew around the outside to give myself a cutting line.

Here it is cut out. The actual pattern is hard to discern but could be countered if I had drawn in some connecting lines before I etched it. Good tip to remember - the negative space on the stencil is the bit that will stand out 'cos it will be the raised surface - duh (insert head slap here)

Pewter is pretty soft so my intention for these stencils would be to create patterned hearts that would be fixed to larger, sturdier hearts like this one. The end product of the experiment hasn't knocked my socks off but now I know the stencils can work and will be a better judge of the type of patterning next time. Just gotta get me some more acid - mwhahahah!
Class dismissed.
No comments:
Post a Comment